
 Ok Blokesters, I promised to deliver and here it is. This is the blog tip that you’ve all been waiting for. The absolute best way to move your Blogger blog over to WordPress, including the elusive Holy Grail for redirecting your blog posts and keeping your blog authority and Google Juice.
One of the reasons that my writing has been sparse lately is because I’ve spent days sourcing out scripts, plugins, and documentation to figure out the best way to redirect my old Blogger posts to WordPress.
Whew! Throughout my journey I soon discovered there is no shortage of help out there, but unfortunately none of them worked very well, or not at all.
Not one to give up easily I had to dig in my heels and get down and dirty, and I’ve finally got the answer for you. So sit back and relax (I know that I will after writing this) in the knowledge that all of your old Blogger links will continue to work.
1. Change your Domain Host DNS Settings:
Go into your Domain Name host (I use GoDaddy) and change the Nameserver setup according to your blog host’s instructions. Your blog host company should have emailed you the directions how to do this. If not, then give them a call.

Please Note: Make sure you have set up your Custom Domain on Blogger before giving control over to your new blog host. See step #3 on Blogger Custom Domains: Best Setup for Optimizing your Blog ! if you don’t know what I’m talking about.
2. Import your Blogger posts into your WordPress blog:
You will find the Import link under the menu Manage in your WordPress dashboard. Just follow the directions and let WordPress perform its magic.
Note: If it doesn’t work, open up a wordpress.com account and import from there. Then export the file to your desktop and import it back again via your self-hosted WordPress dashboard.

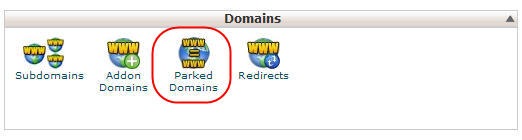
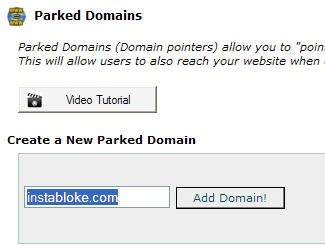
3. Park Your Old Blogger Custom Domain (if different than your New Domain Name) in your WordPress cPanel:
If you were hosting your Custom Domain on Blogger and you are going to use a different domain name (like I did, moving from Instabloke.com to BlogBloke.com) you will have to park the old Blogger Custom Domain in your new domain’s cPanel.
This is what my cPanel looks like:
4. Create and/or Modify the ”.htaccess” file:
If you don’t have an .htaccess file you can find more information about it at the htaccess Tutorial or the Comprehensive guide to .htaccess. Be sure to make it’s file permissions writable and put it into the root directory of your blog via your blog host cPanel.
This is the Holy Grail for redirecting your old Blogger posts over to WordPress. What’s so great about it is it’s not complicated, is easy to set up … and unlike the others I checked out — this technique actually works!
I’ve literally spent days playing and experimenting with various plugins, php code and Apache redirects and I believe I’ve found the very best (and easiest) setup for redirecting your old Blogger links to WordPress.
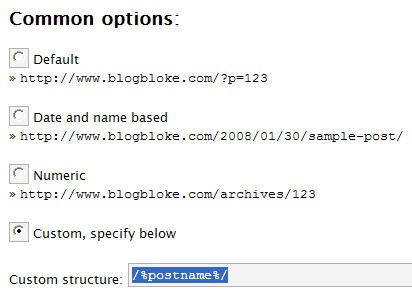
This method assumes that you will be using the permalinks custom structure/%postname%/ (you will find it in your WordPress dashboard under the Options, Permalinks, Custom Structure menus) which is the best link structure for SEO optimization.
So here is your redirect code:
RedirectMatch permanent ^/[0-9]{4}/[0-9]{2}/([a-z0-9]+) http://yourblog.com/$1
Just copy and paste the above code into your .htaccess file before the line:
# BEGIN WordPress
What it all Means:
RedirectMatch
This statement calls Apache’s mod_alias module.
permanent
This tells the search engines the redirect is permanent. The old address is no longer valid and should be replaced with the new address.
^/[0-9]{4}
The first address we are matching, beginning with a four-digit year stamp.
/[0-9]{2}
This is the next address we are looking to match which will have a two-digit month stamp.
/([a-z0-9]*)
This is where (what WordPress calls) the ”post slug” goes. It can contain any number of lowercase letters, numbers and dashes.
http://yourblog.com/$1
This is the address that we want to redirect to (i.e. your blog). The $1 variable at the end is replaced by whatever was matched in the previous statement.
Now watch the magic begin. Click on this link:
http://www.instabloke.com/2007/12/flexibile-blogging-join-revolution.html
and you will see what I mean. Keep your eye on the address bar in your browser and see how fast and seamlessly it redirects from the old blog to the new. No fuss, no muss. You will also note the .html extension has disappeared too. COOL!
From my experience there is no perfect setup that will work absolutely 100% of the time, but this should work about 99% of the time and those are pretty good odds as far as I’m concerned.
I say 99% because Murphy’s law rules and there will be (at least there was in my case) the odd link that was changed during the import stage that the redirect couldn’t find a match. So it made a best guess that was either incorrect, or it defaulted to my user-friendly 404 page.
Chances are you didn’t fiddle with your post titles after first publishing it like I did, so you probably won’t even notice anything. Either way, it’s still automatically redirecting to my Wordpress blog and that is a good thing. I’m happy with the results and so should you.
5. Tell Blogger to STOP letting the search engines index your site:
In your Blogger Dashboard, click on “Settings“, “Basic” and scroll down to where you see “Let search engines find your blog?” Choose “No”.

You can also put the following meta tag in your template, right after the < head > tag:
< meta content=’NOINDEX, NOFOLLOW’ name=’ROBOTS’/ >
Just be sure to close up the < > brackets.
6. Switch Your Feedburner Newsfeed:
All you have to do is replace your old Blogger feed with the new WordPress feed in your Feedburner dashboard.

If you are smart like I know you are, you will also comment-out the following code from your Header PHP file:
<!– < link rel=”alternate” type=”application/rss+xml” title=”RSS 2.0″ href=”< ?php bloginfo(’rss2_url’); ?>” /> –>
<!– < link rel=”alternate” type=”text/xml” title=”RSS .92″ href=”< ?php bloginfo(’rss_url’); ?>” /> –>
<!– < link rel=”alternate” type=”application/atom+xml” title=”Atom 0.3″ href=”< ?php bloginfo(’atom_url’); ?>” /> –>
And replace it with:
< link href=’http://feeds.feedburner.com/yourname’ rel=’alternate’ title=’Your Full Feed’ type=’application/rss+xml’ />
Again, please close up the < > brackets .
So why why should we do this? I’m glad that you asked. We do it so our feed stats won’t be diluted. You only want to offer your readers one newsfeed option – and that is Feedburner.
Blogger also allows you to seamlessly transfer your existing subscribers. In your Blogger dashboard go to Settings, Site Feed. In the Post Feed Redirect URL box, enter your new FeedBurner address. This will redirect your subscribers.

Fix Your Internal Blogspot Links:
One more thing. If you are like me you might have internal links pointing to old posts that have a Blogspot address. Internal links also count with the search engines so you don’t want to bleed your page rank over to your dead blog.
If your blog is large like mine, trying to change each individual link can be a real pain and a time waster. Fortunately I found a solution that someone else has already solved.
Grab this WordPress plugin and watch it perform it’s magic.
In Conclusion:
If you follow these directions correctly you shouldn’t lose any Google Juice from the move, or in other words your rank and authority should transfer to your new blog from the old as the search engines follow the redirects. It is all done automatically, working seamlessly in the background and your readers won’t even notice the difference.
Because we are using the .htaccess file for redirection it’s very F-A-S-T and easy to do as compared to trying to do the same thing with messy scripts, PHP or unsecure plugins (which don’t seem to work very well either).
Oh yes, one more thing. Whatever you do, do NOT delete your old Blogger posts or your blog either for that matter. Why? Because you want to keep your Googly Juices flowing with the redirects, and if you delete your blog entirely some spammer might snap it up.
I hope you enjoy this as much as I did writing it. Cheers!
P.s: You should also read Moving Blogger Over to WordPress: The Good, Bad and the Ugly that will give you a good overview of all of the issues.
UPDATE: There seems to be some confusion amongst readers understanding the difference between a Domain Host and a Blog Host.
The Domain Host (like for example GoDaddy) is the company that hosts your Custom Domain name. If you use GoDaddy to manage your Custom Domain you will find it under the Domain Manager menu after you log in.
The Blog Host is the company that hosts your WordPress installation and theme files. If you don’t know where your cPanel is you need to contact your Blog Host company and ask them for the URL address and password.
I hope that helps.